Training your core is not just about building a six-pack. The muscles of the core include everything from the base of your neck to the top of your legs (basically remove your head, arms and legs and you are left with your core)
The muscles that make up this area of the body not only provide balance and stability but are the foundation for our ability to produce almost every movement we make like bending, twisting, lifting, reaching overhead and even just standing still.
A strong, stable core also reduces your risk of falls and contributes to a healthy back, whereas weakness in the muscles of the core is the #1 risk factor for potential injuries (specifically in the low back but also the shoulders, hips and knees).
Building strength, stability and power in the core should be the basis of every fitness program, because as you can see, it translates into efficient and pain free movements in the rest of your workouts as well as every other activity you perform in your day.
The question then becomes, “What is the best way to train the core?”.
Well it’s not just a bunch of crunches or sit-ups at the end of your workout. A core training program should begin with a focus on stabilization then progress to strength and finally power
Stabilization
This is the first phase of core training. At this level, there is little to no movement of the spine (no bending or twisting). It involves spinal stability achieved through “drawing in” & “bracing”
Drawing in
‘Drawing in’ activates the small muscles around the base of the spine as well as the pelvic floor. Imagine pulling the belly button in towards the spine then pulling it downwards.
Bracing
The act of bracing happens when you isometrically contract the core muscles -imagine tightening your core or bracing in anticipation of being lightly punched in the stomach.
Once you have mastered the feeling of bracing and drawing in you can take it to exercises that help to build core stability like Bird Dog, Plank & Side Plank
Bird Dog
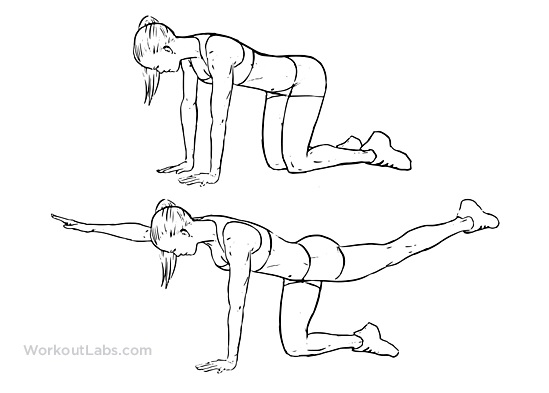
- Kneel with knees hip-width apart and hands firmly on the ground about shoulder-width apart. Brace the abdominals.
- Practice lifting one hand and the opposite knee just an inch or two off the floor while balancing on the other hand and knee and keeping your weight centered.
- When you feel steady and ready to move on to full range of motion, point the arm out straight in front and extend the opposite leg behind you. You should form one straight line from your hand to your foot, keeping hips squared to the ground. If your low back begins to sag, raise your leg only as high as you can while keeping your back straight.
- Hold for a few seconds, then return your hands and knees.
- Switch to the other side.
- Keep the abs engaged throughout the entire exercise, and work to minimize any extra motion in your hips during the weight shift.
Plank
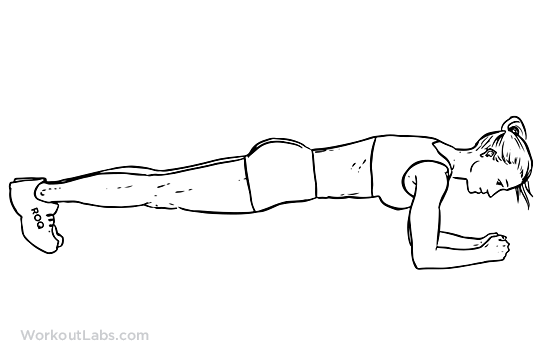
- Begin in the plank position, face down with your forearms and toes on the floor. Your elbows are directly under your shoulders and your forearms are facing forward. Your head is relaxed and you should be looking at the floor.
- Engage your abdominal muscles, drawing your navel toward your spine. Keep your torso straight and rigid and your body in a straight line from ears to toes with no sagging or bending. This is the neutral spine position. Ensure your shoulders are down, not creeping up toward your ears. Your heels should be over the balls of your feet.
- Hold this position for 10 seconds. Release to floor.
- Over time work up to 30, 45, or 60 seconds.
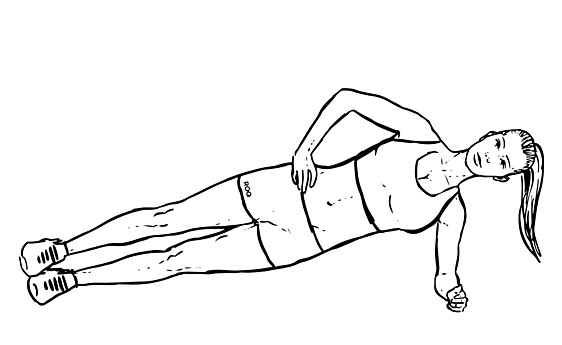
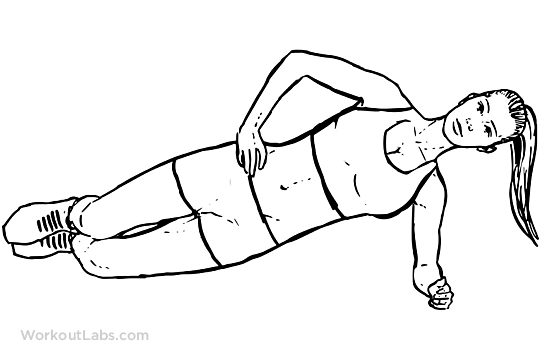
Side Plank/Modified Side Plank
- Lie on your right side, legs extended and stacked from hip to feet. The elbow of your right arm is directly under your shoulder. Ensure your head is directly in line with your spine. Your left arm can be aligned along the left side of your body.
- Engage your abdominal muscles, drawing your navel toward your spine.
- Lift your hips and knees from the mat while exhaling. Your torso is straight in line with no sagging or bending. Hold the position.
- After several breaths, inhale and return to the starting position. The goal should be to eventually hold for 60 seconds. Change sides and repeat.
Strength
The next phase of core training involves building core strength. This involves movement of the spine through large ranges of motion like flexion (bending forward), extension (bending backwards) and rotation or twisting. Bicycle Crunches, Superman & Wood Choppers are examples.
Bicycle Crunches
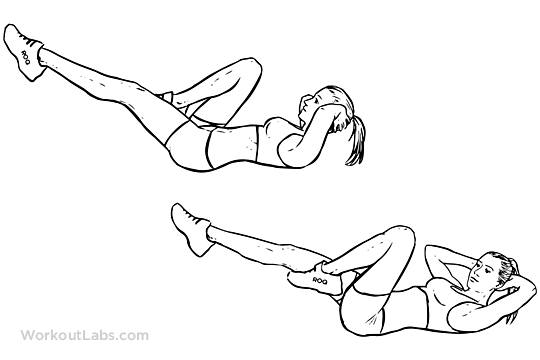
- Lie on the floor with your lower back pressed to the ground
- Put your hands behind your head, then bring your knees in towards your chest and lift your shoulder blades off the ground, but be sure not to pull on your neck.
- Straighten your right leg out to about a 45-degree angle to the ground while turning your upper body to the left, bringing your right elbow towards the left knee. Make sure your rib cage is moving and not just your elbows.
- Now switch sides and do the same motion on the other side to complete one rep.
Superman
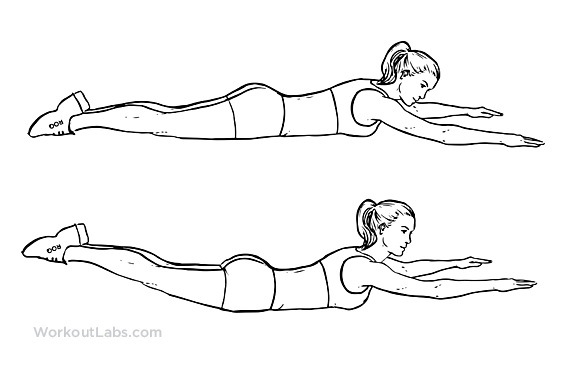
- Lie face down on a mat, with your legs straight and your arms outstretched in front of you.
- Pull your belly button in towards your spine to brace your core.
- Raise both your arms and legs at the same time so that they hover off the floor, forming a bowl shape with your body.
- Hold this position for a few seconds.
- Lower back to the starting position. You should feel your lower back, glutes and hamstrings working in the hold position.
Wood Choppers
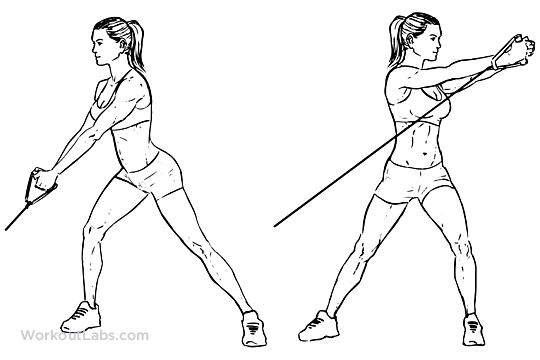
- Stand with your side to the cable machine. Grab the handle with the opposing hand first. Keep a flat back and tight core throughout the movement. Squat down by bending your knees and driving your hips back.
- Keeping your feet in position, rise and twist the weight to the opposite side of your body.
- Pause, contract the muscle and slowly return to the starting position.
- This move can also be done with a resistance band (anchored to the floor) or with a weight in your hand
Power
The final phase involves power. Core power exercises use little to no resistance and focus on the movement’s rate of force production or speed. They usually involve throwing things like medicine ball throws or slams.
Medicine Ball Slam
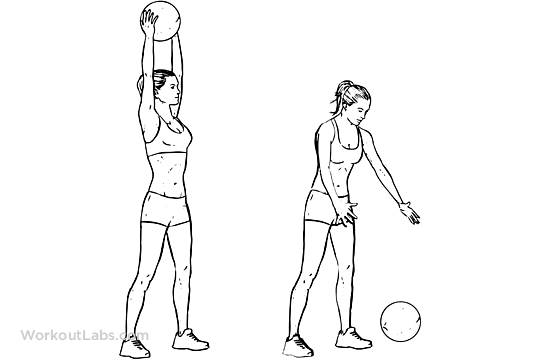
- With slightly bent knees and a tight core, hold a medicine ball in front of you at hip-level.
- Begin by raising the medicine ball upward above your head with both hands.
- Keeping your elbows bent, forcefully throw the ball at the ground.
- Catch the ball as it bounces back up, and bring it back up above your head.
- Repeat this slam and catch movement.
So while many of us equate core strength with a flat belly or six-pack abs, there are so many more benefits that come from improving core strength than how your stomach looks like improved posture, better balance, reduced back pain and easier breathing.
As with everything, start small and work your way up slowly, focusing on the progressions outlined above
Once you begin to focus on core stability, strength and power and perform these movements on a regular basis you will notice an improvement in the way you look, feel and move throughout your day.
Willpower not required.
Looking for more exercise ideas? Check out the other articles in the blog here
Want to know how we can help you get stronger, leaner and pain free? Click here to find out more about Fired Up Fitness and our services.

